Entering Response Details
-
From the Exception Report List click the Printed Exception Report button. The second button on the menu bar.

N.B. If you know the Exception Report ID you can search for it using the search feature.
-
From the Printed Exception Reports List, double click on your exception report you require.
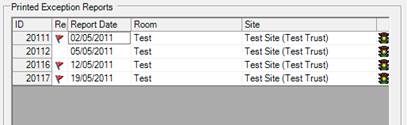
N.B. Red Flags in the second column represent exception reports for which the responses have not been completed within the response period.
-
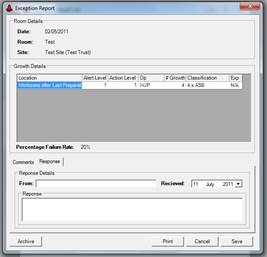
The Exception Report form will open, showing all the details of the chosen exception. By default the form will open with the response view showing.
-
Enter the Response details. This includes who the response is from, the date on which the response was received and the response.
-
Click the Save button to save the response details.

-
The Exception Report Saved dialog will confirm that the exception report has been successfully saved. Click the OK button to continue.

N.B. By default exception reports will automatically be archived once a response has been entered.